Reroofing looks simple from the sidewalk. A bundle of shingles, a nail gun, a sunny day. Then you open the code book, walk a roof with soft decking, and start tallying penetrations, valleys, and wind zones. The real work is judgment: matching manufacturer instructions to local code, planning the details that stop leaks before they start, and documenting what you did so an inspector nods and signs off. I’ve been on jobs where a great-looking shingle roof failed in its first winter because the crew skipped nails on a steep slope. I’ve also seen thirty-year shingles outlast their warranty simply because the installer respected the basics and didn’t cut corners when conditions changed.
This guide is built around what actually matters for roof shingle installation, repair, and replacement. It focuses on asphalt shingles, since they dominate the market, but the broader compliance mindset applies to other materials as well. If you plan to hire a shingle roofing contractor, use this as a way https://donovanqlaa562.bearsfanteamshop.com/seasonal-checklist-for-shingle-roof-maintenance-and-repair to ask better questions. If you are in the trade, consider it a field-tested checklist in prose.
Why codes and manufacturer instructions both matter
Building codes set minimum standards for safety and durability. They are not installation manuals. Manufacturers publish instructions that tie directly to warranties and performance testing. When the two conflict, the stricter rule usually prevails on site, and inspectors expect you to follow both. The International Residential Code (IRC) incorporated by many jurisdictions references ASTM shingle standards and sets baseline requirements for underlayment, fasteners, and ventilation. Local amendments often add wind and ice provisions. Meanwhile, shingle makers spell out nail count, exposure, and special slope conditions. Ignore either source and you risk a roof that fails or a warranty claim that dies on the first phone call.
I’ve been on coastal projects where the code required six nails per shingle and sealed edges on rakes, and on mountain jobs where ice-barrier coverage had to extend 24 inches inside the warm wall line. These details are not trivia. They are the difference between a roof that survives the first nor’easter and one that sprinkles drywall after every gust.
Understanding the roof you have
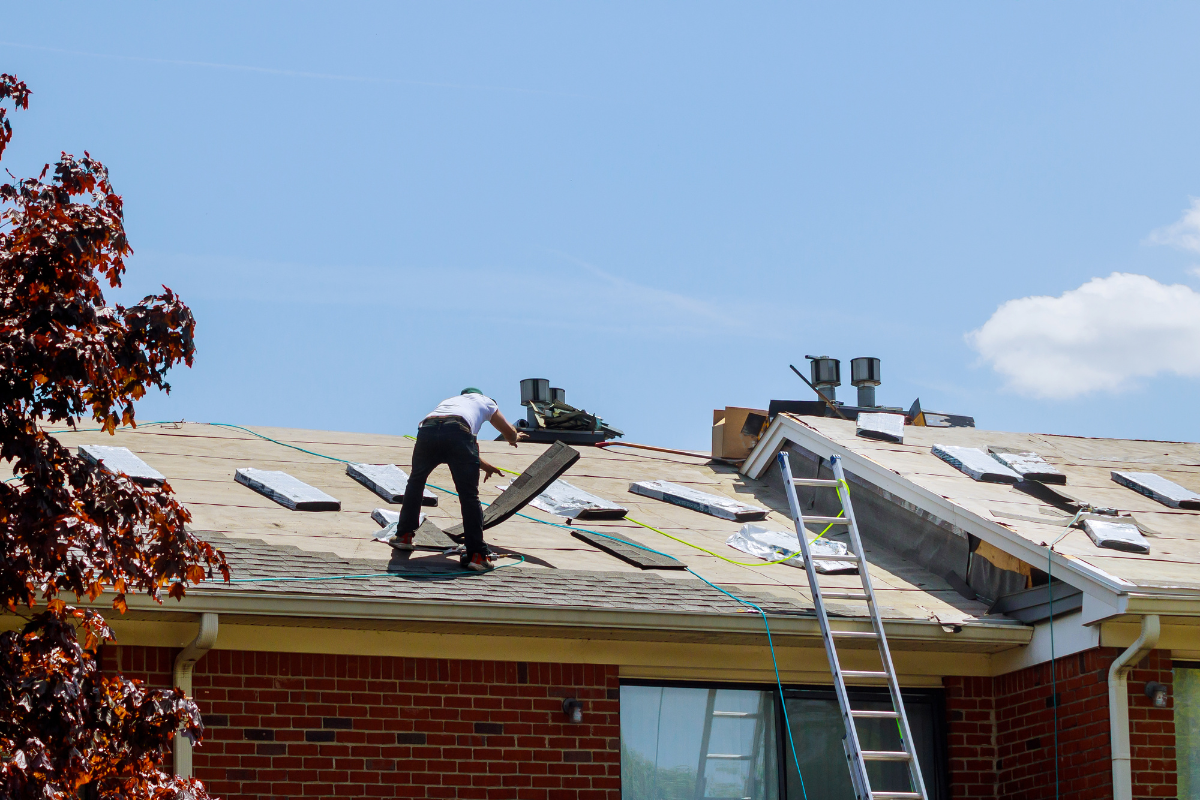
Before any roof shingle installation or roof shingle replacement, read the structure. Decking type matters. Old plank decking with quarter-inch gaps behaves differently from modern OSB. Loose or rotted boards will telegraph through new shingles and compromise fastener hold. Walk the roof and note soft spots, delamination, and nail corrosion around old vents. Take photos and measurements, not for social media, for the permit file and your own memory when the inspector asks about the repaired area by the north dormer.
Slope is the next call. Asphalt shingles are rated for slopes 2:12 and steeper, but the details change at low slopes. From 2:12 up to 4:12, you must use a specific underlayment method, typically a double layer of felt or a full coverage self-adhered membrane depending on climate and manufacturer. A lazy reading of the box label can get you in trouble here. Above 4:12, standard single-layer underlayment works unless wind or ice rules say otherwise. Very steep slopes look pretty, but they also demand more nails and careful staging to avoid scuffing the granules when heat softens the binder.
Ventilation is easy to overlook. It is also a frequent code red tag. Balanced intake and exhaust keep attic temperatures and moisture under control, protect the decking from mold, and preserve shingle life. The usual guideline is net-free area equivalent to 1/150 of attic floor area, which can be reduced to 1/300 with a properly balanced system and vapor retarder. A shingle roof can fail young, cupping and cracking, just because the attic cooks all summer. If you are planning shingle roof repair in a hot zone and the shingles are brittle after ten years, look for blocked soffits and undersized ridge vent before blaming the material.
Permits, inspections, and the paperwork that saves you later
Pull the permit when required. Many municipalities ask for one if more than a certain percentage of the roof is replaced. Inspectors in my area want to see ice barrier, underlayment, flashing, and ventilation before the shingles fully cover everything. Some will allow photos, some want to climb a ladder. Call ahead and ask. When you plan a roof shingle replacement, sequence your tear-off and dry-in so you can show what the code official needs without leaving the house vulnerable to a stray storm.
Keep the data: manufacturer, product line, lot numbers on the bundles, nail type and length, underlayment brand, and all vent and flashing components. If a shingle blow-off occurs in year three and you find a batch issue, those lot numbers are leverage. More commonly, you will show the homeowner or insurer exactly what was installed and why a roof shingle repair is a fix, not a redo.
Deck prep and repair that takes nails the right way
Fasteners only matter if the deck holds them. If you see dark rings where old nails rusted or find nails that the gun can’t seat flush, you need to re-deck or at least patch. Code requires a solid sheathing deck. On plank decks with gaps larger than a quarter inch, add a layer of OSB or plywood. If money is tight and the homeowner insists on keeping the plank deck, plan for ring-shank nails to improve hold, and warn them that the warranty may frown on the mixed substrate.
Remove all old fasteners and debris. A roofing shovel speeds tear-off, but it can gouge the deck. I keep a magnet roller on site to capture nails before they find tires or dogs. Drive any proud nails flush. You want a clear field, no bumps that will telegraph through the new shingles.
Underlayment and ice barriers, done for your climate not a catalog photo
Underlayment choices now include synthetic sheets with excellent tear resistance and traditional felt. Both can meet code, but their handling on steep slopes and in heat is different. Synthetics resist wrinkling and walk better, though some get slick when dusty. Check the temperature range and nail pattern printed on the roll. Felt can absorb moisture then flatten out as it dries, which can be helpful if you need to cover quickly and shingle a day later. If you plan a two-day roof shingle installation and the forecast hints at wind, synthetics typically hold up better overnight.
In cold climates, ice barrier is non-negotiable. The common rule is to extend a self-adhered membrane from the eave up to at least 24 inches inside the exterior wall line. On a low eave with a deep overhang, that can be two courses. Valleys, rakes near ocean exposure, and roof-to-wall sections often benefit from extra coverage. Do not skip primer on aged or dusty decking if the membrane manufacturer requires it. A poorly bonded ice barrier can wrinkle and create a trough that gathers water and salts the first freeze.
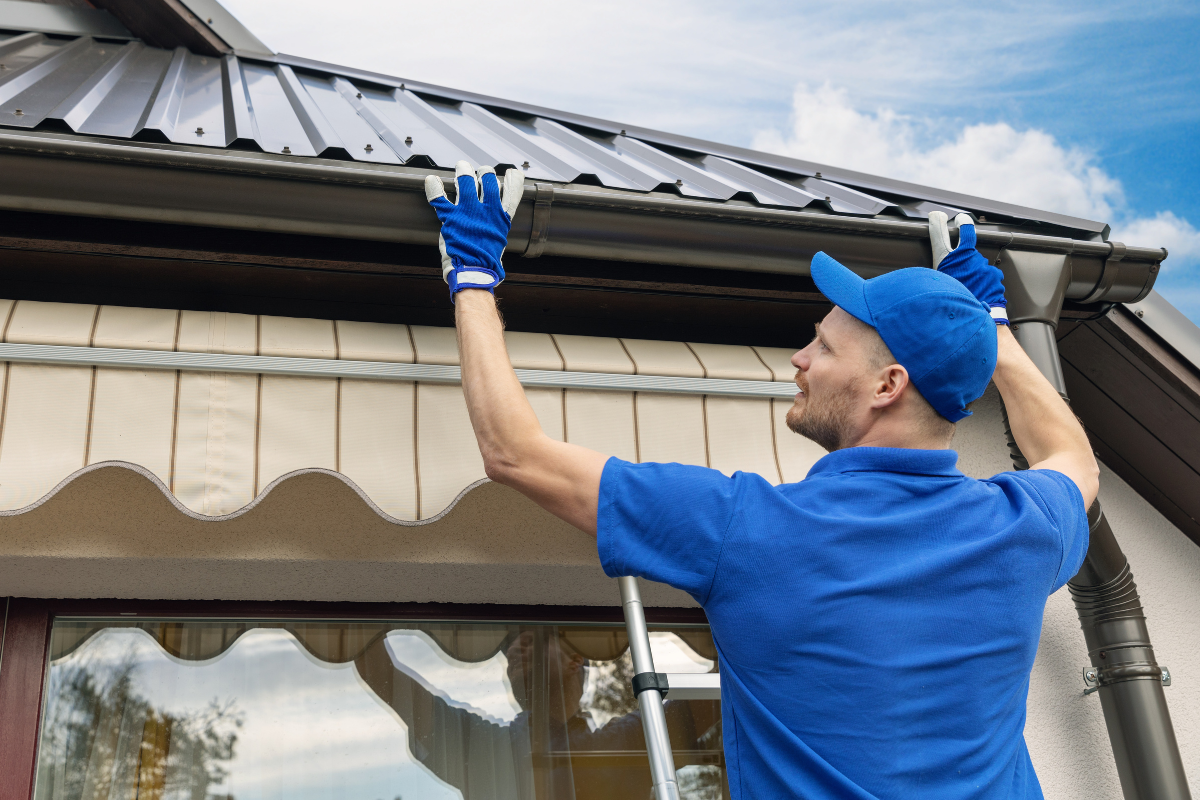
Flashing is not an accessory
Water follows gravity, surface tension, and capillary action. Flashing manages all three. Reusing old flashing is tempting on a tight schedule, but more often than not it is false economy. Galvanized step flashing corrodes from trapped moisture. Chimney counterflashing gets loose in mortar joints. Drip edge that lacks hemmed edges slices underlayment over time.
At eaves and rakes, install drip edge under ice barrier at the eave and over the underlayment at the rake unless the local code states otherwise. Hemmed drip edge is safer to handle and less likely to cut through. In valleys, choose your method: open metal valley, closed-cut with shingles, or woven. In snow country or heavy rain zones, I prefer open valleys with a ribbed or W-shaped metal that creates a center channel and reduces cross-flow in wind. Line the valley with ice barrier, then your metal, then integrate underlayment for shingle tie-in. In hurricane-prone areas, seal valley edges per manufacturer with compatible mastic and consider a wider metal.
At walls, step flashing should be installed per course, one piece per shingle course, with at least a 2 inch overlap. Continuous “one-piece” wall flashing under shingles is faster, but it creates failure points at corners. Counterflash into masonry with a reglet cut or manufactured receiver. For siding, slip counterflash behind the weather-resistive barrier, not just behind the siding. Every penetration gets a boot or custom metal with proper overlap and sealant rated for UV and temperature swings. I carry lead, aluminum, and high-temp pipe boots. Silicone is not a miracle cure. Don’t smear it where metal and mechanical overlap should do the job.
Nailing patterns and fasteners that pass both wind and warranty
Nail count and placement are the heartbeat of shingle roofing. Three-tab shingles typically require four nails per shingle, laminated architectural shingles often require six in high-wind zones or per specific product guidance. Nails go just above the shingle’s exposure line in the common bond area. Miss that, and you reduce the shingle’s resistance to uplift. Overdriven nails cut the shingle and give you a leak path. Underdriven nails prop the next shingle and telegraph. Set your gun pressure at the start of the day and recheck as temperatures change.
Length matters. Code expects nails to penetrate at least 3/4 inch into wood decking or fully through the deck with at least 1/8 inch showing on the underside. Over plank decking, 1 1/4 inch roofing nails typically meet the mark. Into plywood or OSB, 1 1/4 inch also works for most shingles, but go longer if you add a recover layer or nail through ridge vent and cap layers. Use corrosion-resistant nails, hot-dipped galvanized or equivalent. Coastal zones may require stainless. Staples are generally not allowed under modern codes for asphalt shingles unless explicitly permitted by the manufacturer, and even then, they complicate inspections.
On steep slopes, gravity is not your friend. Six nails per shingle and additional sealant dots at the rake edges can keep a gust from lifting newly laid courses before they self-seal. If you install in cool weather, the factory sealant may not activate. Hand sealing with dabs of asphalt roof cement behind shingle tabs at rakes and along hips helps, but don’t smear cement across the field. It can trap moisture and look sloppy.
Planning courses, offsets, and ventilation routes
Layout is not busywork. Start straight and you finish straight. Snap a line at the eave for course one, then plan your starter strip. Starter shingles should be manufactured pieces or properly cut shingles with self-seal at the edge. Install them with the sealant strip near the drip edge so wind can’t lift the first course. Offsets between courses vary by product. Many laminated shingles require a specific offset pattern to avoid creating vertical seams that channel water. Follow the stagger diagram, not a habit from a different brand.
Ridge cap shingles should match the field. Low-profile improvised caps from three-tabs can work on small jobs, but laminated caps that match the product often look better and stand up to wind. Before capping, cut the ridge vent slot to the manufacturer’s width, usually leaving several inches uncut at hips and gable transitions to maintain structural integrity. Pair ridge vent with adequate soffit intake. Without intake, a ridge vent can pull conditioned air from the living space and underperform.
Weather windows and staging that respect the clock
I like to watch the forecast, then plan tear-off by slope. Tear one area, dry it in, then shingle before moving on. It reduces exposure if a storm pops up mid-day. Hot days soften shingle asphalt by late morning. Store bundles in shade or inside when possible and stage fewer bundles on steep slopes to avoid creating dents. On cold days, shingles can crack under foot. Warm them in the truck or a heated garage when possible and consider hand sealing rakes and peaks.
Also, roof safety is part of compliance. Codes reference OSHA practices indirectly through workplace rules. Harnesses, anchors rated for the loads, and toe boards are not optional on steep slopes. They help you lay nails correctly rather than rushing because you are uncomfortable.
Common failure points and how to avoid them
I have repaired more leaks at three places than anywhere else: roof-to-wall junctures, valleys, and penetrations. Wall leaks usually trace to skipped or reused step flashing. A clean, per-course step and counterflash solves it. Valley leaks come from woven shingles in cold climates that wick and freeze or from closed-cut valleys where the cut edge runs too near the center. Open metal with proper underlayment and ribbed profile helps. Penetration leaks are often due to aging neoprene on pipe boots. High-temp silicone boots or lead boots around hot stacks last longer. During shingle roof repair, don’t just swap a boot; inspect the decking around the pipe for softness and correct the slope of nearby shingles that might trap water.
Another frequent problem is shingle blow-off before sealing. I have seen this after winter installs where the sealant never warmed. Six nails and hand sealing the first few courses near rakes avoids callbacks. In a wind event, a single missing shingle can lead to water traveling beneath multiple courses. For emergency shingle roof repair, slide a replacement under the course, align the sealant, and hand-seal the edges if temperatures are low. If many are missing, you are looking at a partial roof shingle replacement, which requires careful color matching and a frank conversation about long-term value.
Regional code nuances that influence your choices
- Snow and ice zones: Expect ice barrier to extend at least 24 inches inside the warm wall, sometimes 36. Open valleys with ribbed metal and closed eaves help. Ventilation must be balanced to prevent ice dams from forming under snow blankets. Hurricane and high-wind regions: Six nails per shingle is common, and some jurisdictions require enhanced edge securement with sealed underlayment at rakes and eaves. Hip and ridge caps should be rated for the wind speed in the local design map. Wildfire-prone areas: Class A fire-rated assemblies are required, which means pairing Class A shingles with approved underlayment and deck configurations. Metal flashings must maintain clearances from combustible siding. Gutter guards and eave details that reduce ember entry help. Coastal corrosion: Stainless fasteners and aluminum or stainless flashing hold up better than basic galvanized. Sealant choices need marine-grade UV stability. Drip edge with a kickout reduces streaking and staining on fascia. Historic districts: Tear-off rules, material appearance, and color can be regulated. Even asphalt can be approved if the profile resembles traditional forms. Plan for additional review time.
Repair, replace, or wait: practical decision points
Homeowners often ask whether a shingle roof repair will buy them time or if they should jump to a full roof shingle replacement. I look at three factors: age, pattern of failure, and underlying deck condition. An isolated ridge cap blow-off on a ten-year-old architectural shingle might be a quick repair. Granule loss across broad areas, curling edges, and wide-spread sealant failure indicate the roof is near the end. Soft decking means hidden costs that amplify on the second or third repair. When repairs happen every storm season, replacement becomes the cheaper path within two or three years.
If you choose patching, keep the shingle model in mind. Manufacturers change colors and blends every few years. Perfect matches are rare after five to seven years. For a visible slope facing the street, plan an intentional break point at a hip, valley, or ridge line to hide color transitions. That might mean a larger repair area, but the visual payoff matters for property value.
Choosing a shingle roofing contractor who respects the details
You do not hire a shingle roofing contractor for muscles alone. You hire their judgment and their discipline. Ask to see manufacturer credentials and recent permits pulled. Request a written scope that names the underlayment, ice barrier, flashing metals, fastener types, and ventilation plan. If the proposal says “replace as needed” for flashing without specifying materials, expect reuse when you are not looking.
Walk the roof with the estimator if you can. Point out areas where ceilings show stains, soffits look blocked, or the decking felt soft during attic work. The best contractors welcome this because it reduces surprises. If the bid includes a roof shingle installation in winter, ask about hand sealing and staging. If it includes a summer job, ask how they manage bundle storage in heat. You want to hear answers that sound like they’ve solved the problem before, not guesswork.
Warranty realities and how compliance supports them
Manufacturer warranties differ. Some require whole-system components, such as compatible underlayment, starter, and ridge caps, to elevate coverage from basic to enhanced. Others require an accredited installer. Code compliance is the floor. Warranties are the ceiling, and they usually rely on following the published instructions precisely. Keep your documentation. When you sell the house, a transferrable warranty with clear paperwork helps justify your price.
Do not expect a warranty to cover storm damage. That is an insurance matter. However, a properly installed roof using required nailing patterns and edge securement resists wind better, which means fewer claims. With insurers tightening underwriting and pricing roof age into premiums, a code-compliant, well-documented roof strategy has real financial value.
A note on ventilation retrofits during replacement
Attic ventilation in older homes is often an afterthought. When planning roof shingle replacement, seize the chance to correct it. If soffits lack vents, consider retrofit products that replace a section of soffit with vented panels. If insulation has been blown to the roof deck, add baffles to keep air channels open. For houses without ridge lines suitable for ridge vent, gable vents or low-profile roof vents can be balanced with adequate intake. Do not mix systems that fight each other. A ridge vent paired with gable vents can short-circuit the airflow in some configurations, reducing draw at soffits. The goal is cool, dry air moving from eaves to ridge, not a patchwork of openings.
Environmental and disposal considerations
Tear-off produces bulk. Asphalt shingles are heavy, roughly 200 to 450 pounds per square per layer, depending on type and age. Many regions now support shingle recycling where asphalt is processed for road base. Ask your hauler about this. Keep nails and flashings separate if required by local recyclers. Store debris neatly to avoid neighbor issues and ensure the site stays safe. A magnet sweep around the house each day prevents the classic post-job complaint: flat tires and a trail of nails in the lawn.
Cool roof variants of asphalt shingles exist, with higher solar reflectance. In hot climates, they can moderate attic temperatures by several degrees. Not every color is eligible, and some HOA rules still lag behind energy codes. Weigh the thermal benefit against aesthetics, and check if local programs offer incentives for reflective roofing assemblies.
When the weather tests your choices
The first big storm after a reroof is the real inspection. If you followed the rules, used the right nailing pattern, sealed edges in wind zones, and flashed carefully, you will sleep fine. I remember a coastal job where the owner called after a gale. They had neighbors with shingle loss while their roof looked untouched. The difference was not magic. It was six nails per shingle, starter with the seal strip properly oriented, drip edge under ice shield at the eaves, and hand-sealed rake edges because the temperature never got above 50 that week. Compliance is not bureaucracy, it is a checklist of small decisions that add up when weather gets mean.
A concise field checklist
- Verify permits, code amendments for wind and ice, and manufacturer instructions for the specific shingle. Inspect and repair decking; confirm nail hold and correct thickness. Install underlayment suited to slope and climate; place ice barrier to required distance inside warm wall. Flash eaves, rakes, valleys, walls, and penetrations with new, compatible materials; integrate with WRB. Follow nail count, pattern, and placement; confirm ventilation balance before capping the ridge.
Final thoughts from the ridge
Shingle roofing succeeds on predictability. Plan the work, respect the data on the wrapper, and adapt those rules to the realities of your slope, climate, and structure. A well-executed roof shingle installation is quiet. It sheds water, stays put in the wind, and needs only modest attention for decades. When a roof shingle repair is the right call, treat it like surgery: clean margins, correct materials, and a check on the surrounding systems that keep the whole assembly healthy. When a roof shingle replacement is due, see it as a chance to correct old mistakes, from ventilation to flashing to fasteners.
A good shingle roofing contractor understands that a roof is a system, not a surface. Codes and manufacturer requirements are the language we use to build that system so it works when you need it most. If you build with that in mind, inspections are smoother, warranties are stronger, and the roof over your head stops being a question mark every time the forecast looks ugly.
Express Roofing Supply
Address: 1790 SW 30th Ave, Hallandale Beach, FL 33009
Phone: (954) 477-7703
Website: https://www.expressroofsupply.com/
FAQ About Roof Repair
How much should it cost to repair a roof? Minor repairs (sealant, a few shingles, small flashing fixes) typically run $150–$600, moderate repairs (leaks, larger flashing/vent issues) are often $400–$1,500, and extensive repairs (structural or widespread damage) can be $1,500–$5,000+; actual pricing varies by material, roof pitch, access, and local labor rates.
How much does it roughly cost to fix a roof? As a rough rule of thumb, plan around $3–$12 per square foot for common repairs, with asphalt generally at the lower end and tile/metal at the higher end; expect trip minimums and emergency fees to increase the total.
What is the most common roof repair? Replacing damaged or missing shingles/tiles and fixing flashing around chimneys, skylights, and vents are the most common repairs, since these areas are frequent sources of leaks.
Can you repair a roof without replacing it? Yes—if the damage is localized and the underlying decking and structure are sound, targeted repairs (patching, flashing replacement, shingle swaps) can restore performance without a full replacement.
Can you repair just a section of a roof? Yes—partial repairs or “sectional” reroofs are common for isolated damage; ensure materials match (age, color, profile) and that transitions are properly flashed to avoid future leaks.
Can a handyman do roof repairs? A handyman can handle small, simple fixes, but for leak diagnosis, flashing work, structural issues, or warranty-covered roofs, it’s safer to hire a licensed roofing contractor for proper materials, safety, and documentation.
Does homeowners insurance cover roof repair? Usually only for sudden, accidental damage (e.g., wind, hail, falling tree limbs) and not for wear-and-tear or neglect; coverage specifics, deductibles, and documentation requirements vary by policy—check your insurer before starting work.
What is the best time of year for roof repair? Dry, mild weather is ideal—often late spring through early fall; in warmer climates, schedule repairs for the dry season and avoid periods with heavy rain, high winds, or freezing temperatures for best adhesion and safety.